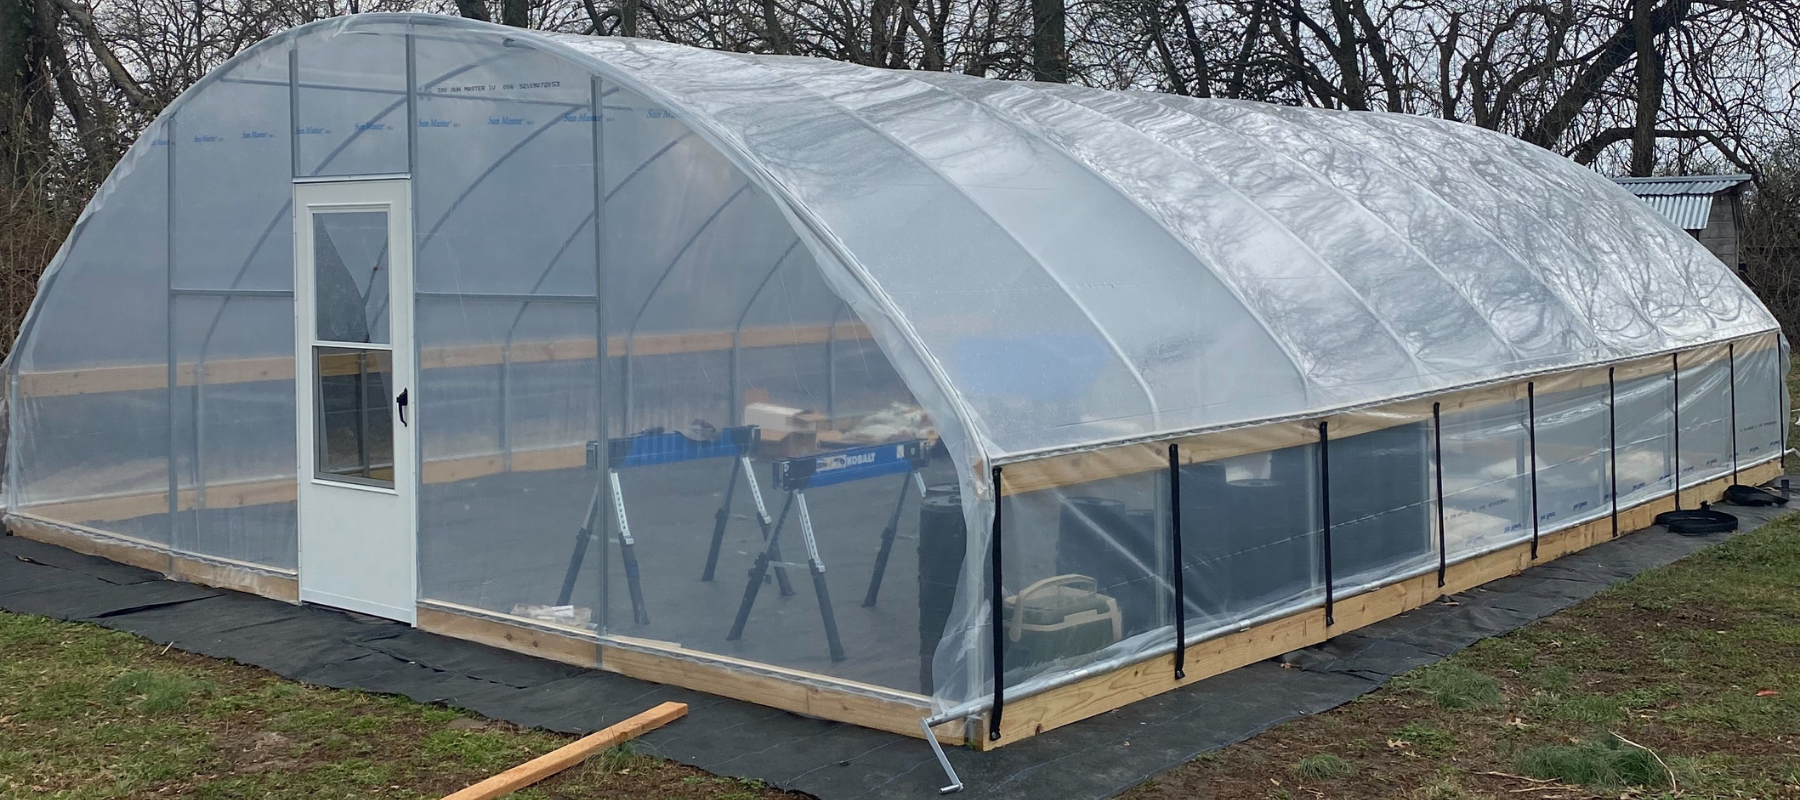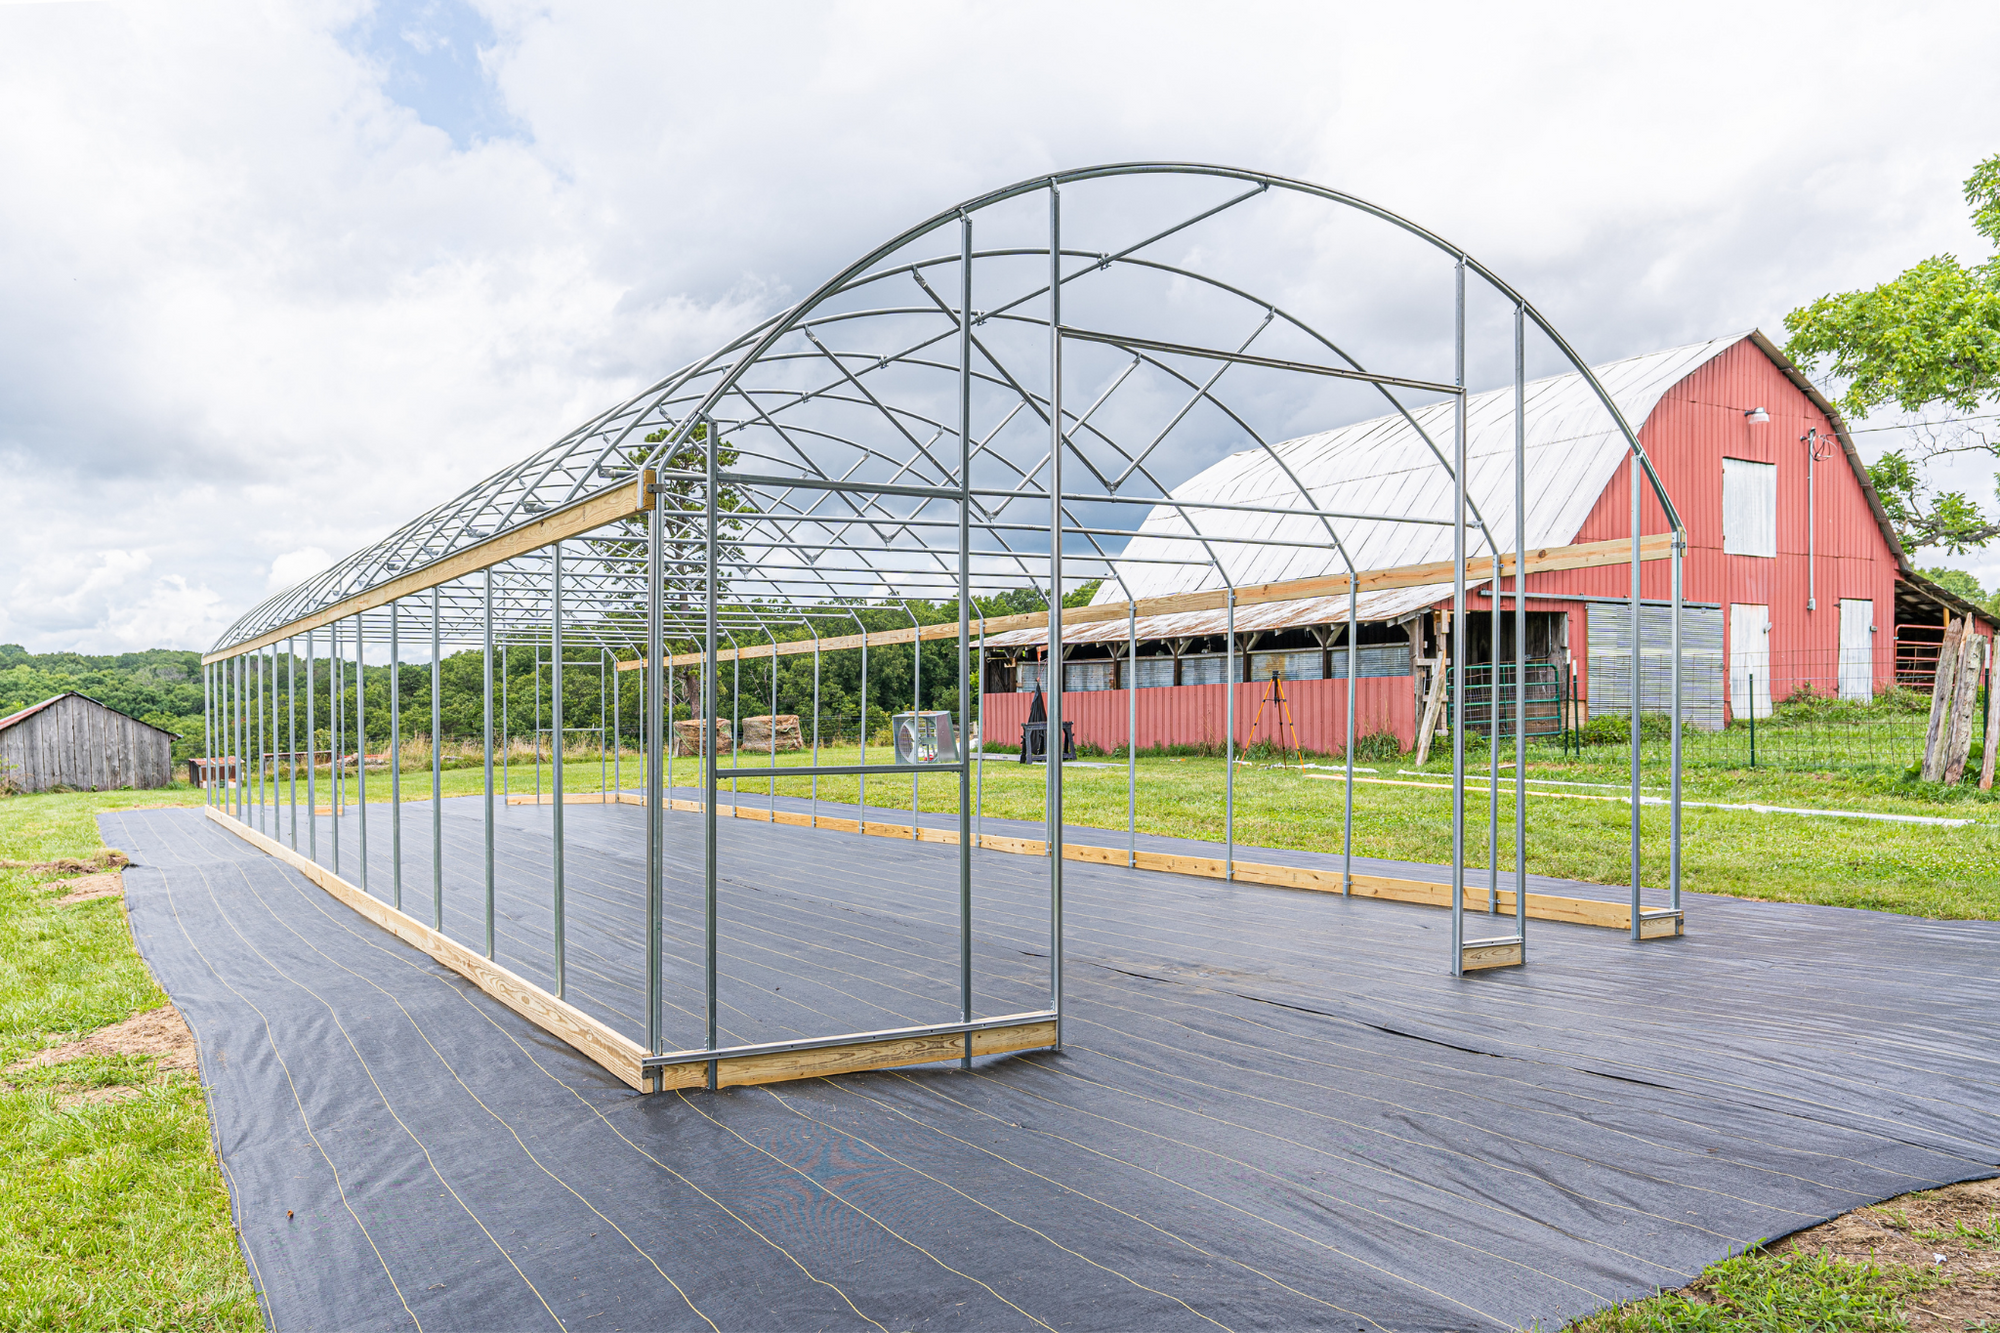


30 Ft LOW SIDEWALL END WALL ASSEMBLY

ATTENTION:
Most Greenhouses may require trimming of uprights for proper fit, because of the unknown grade of your land. Any upright over 12 ft. in length is spliced and labeled connect A to A, B to B, etc.
These instructions assume you have a 36” storm door and rough in for door is 36.5”.
See Fig. 3a and Fig. 3b above if you have end wall kits with 8’ or 10’ roll up doors and possible a 36” door
also.
- On front end-wall, measure to find the center of the house.
- From the center, mark 18” to the left and right of that point. This gives you the door frame size.
- Drive a 1” ground stake in each of these two points (will be approximately 36” apart). This is where your storm door will be.
- From that point, if you have another upright measure 48” over and drive another 1” ground stake Repeat for next upright.
- Measure the distance between the base of these ground stakes and peak of the bow where they will be connecting.
- Cut your square uprights (if needed) to meet these measurements, slide square uprights over the ground stakes with pre-drilled side at the top.
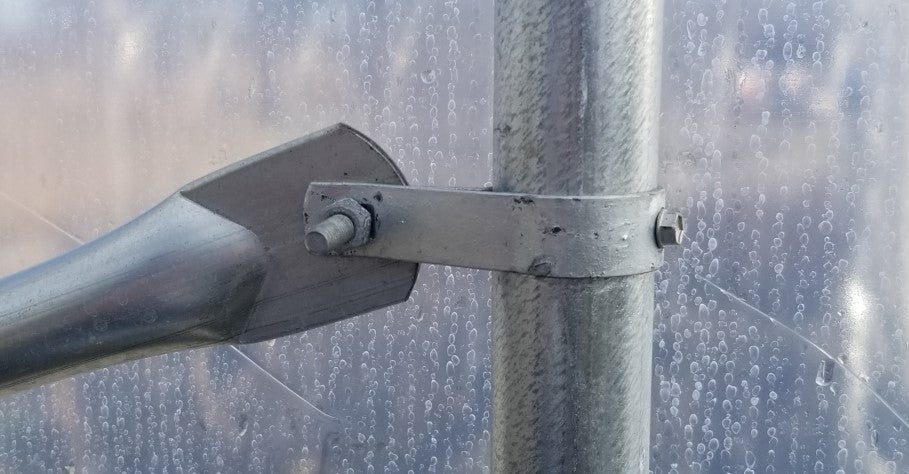
- Attach brace bands over the bow and into the square uprights (see Fig. 2).
- Insert bolts through brace bands and square upright (Tighten completely after door is installed).
- Place one self-tapping TEK screw through the brace band securing it to the bow on the inside of the house, see Fig. 2.
- You may install header supports at chest high, approximately 60”.
- Using TEK screws, install header with corner braces.
- The installation of the rear end-wall is the same. However, header & upright spacing can be adjusted to accommodate a fan or vent if you choose to install one.
Please feel free to call us if you have any questions.
Growerssolution.com 931-528-3390
LIMITATION OF WARRANTY: Grower’s Solution, LLC makes no warranty either expressed or implied, as to any matter in connection with the sale or use of goods or services offered nor does the company make any warranty of merchantability of fitness for any purpose. Grower’s Solution, LLC Is not responsible for improper assembly or improper installation of any products. If any item is warranted by the manufacturer, the buyer shall look solely to the manufacturer for redress of the manufacturer’s warranty.
RECOMMENDATIONS: All recommendations by us are compiled for recognized horticultural sources. Because conditions of use which are of critical importance are beyond our control, we make no warranty or representation, expressed or implied, except that all products conform to the description of the label. We are not responsible for damage or failure because of any recommendations given by us or our personnel. Our liability as the seller shall be limited to the stated selling price of any defective goods, which in no event shall include buyers cost, lost profits or good will, or any other special consequential damages.
ATTENTION:
Most Greenhouses may require trimming of uprights for proper fit, because of the unknown grade of your land. Any upright over 12 ft. in length is spliced and labeled connect A to A, B to B, etc.
These instructions assume you have a 36” storm door and rough in for door is 36.5”.
See Fig. 3a and Fig. 3b above if you have end wall kits with 8’ or 10’ roll up doors and possible a 36” door
also.
- On front end-wall, measure to find the center of the house.
- From the center, mark 18” to the left and right of that point. This gives you the door frame size.
- Drive a 1” ground stake in each of these two points (will be approximately 36” apart). This is where your storm door will be.
- From that point, if you have another upright measure 48” over and drive another 1” ground stake. Repeat for next upright.
- Measure the distance between the base of these ground stakes and peak of the bow where they will be connecting.
- Cut your square uprights (if needed) to meet these measurements, slide square uprights over the ground stakes with pre-drilled side at the top.
- Attach brace bands over the bow and into the square uprights (see Fig. 2).
- Insert bolts through brace bands and square upright (Tighten completely after door is installed).
- Place one self-tapping TEK screw through the brace band securing it to the bow on the inside of the house, see Fig. 2.
- You may install header supports at chest high, approximately 60”.
- Using TEK screws, install header with corner braces.
- The installation of the rear end-wall is the same. However, header & upright spacing can be adjusted to accommodate a fan or vent if you choose to install one.
Please feel free to call us if you have any questions.
Growerssolution.com 931-528-3390
LIMITATION OF WARRANTY: Grower’s Solution, LLC makes no warranty either expressed or implied, as to any matter in connection with the sale or use of goods or services offered nor does the company make any warranty of merchantability of fitness for any purpose. Grower’s Solution, LLC Is not responsible for improper assembly or improper installation of any products. If any item is warranted by the manufacturer, the buyer shall look solely to the manufacturer for redress of the manufacturer’s warranty.
RECOMMENDATIONS: All recommendations by us are compiled for recognized horticultural sources. Because conditions of use which are of critical importance are beyond our control, we make no warranty or representation, expressed or implied, except that all products conform to the description of the label. We are not responsible for damage or failure because of any recommendations given by us or our personnel. Our liability as the seller shall be limited to the stated selling price of any defective goods, which in no event shall include buyers cost, lost profits or good will, or any other special consequential damages.